Monitor shows "No Signal" after changing OSD overclock or DisplayPort settings: how to get the picture back
What to do first
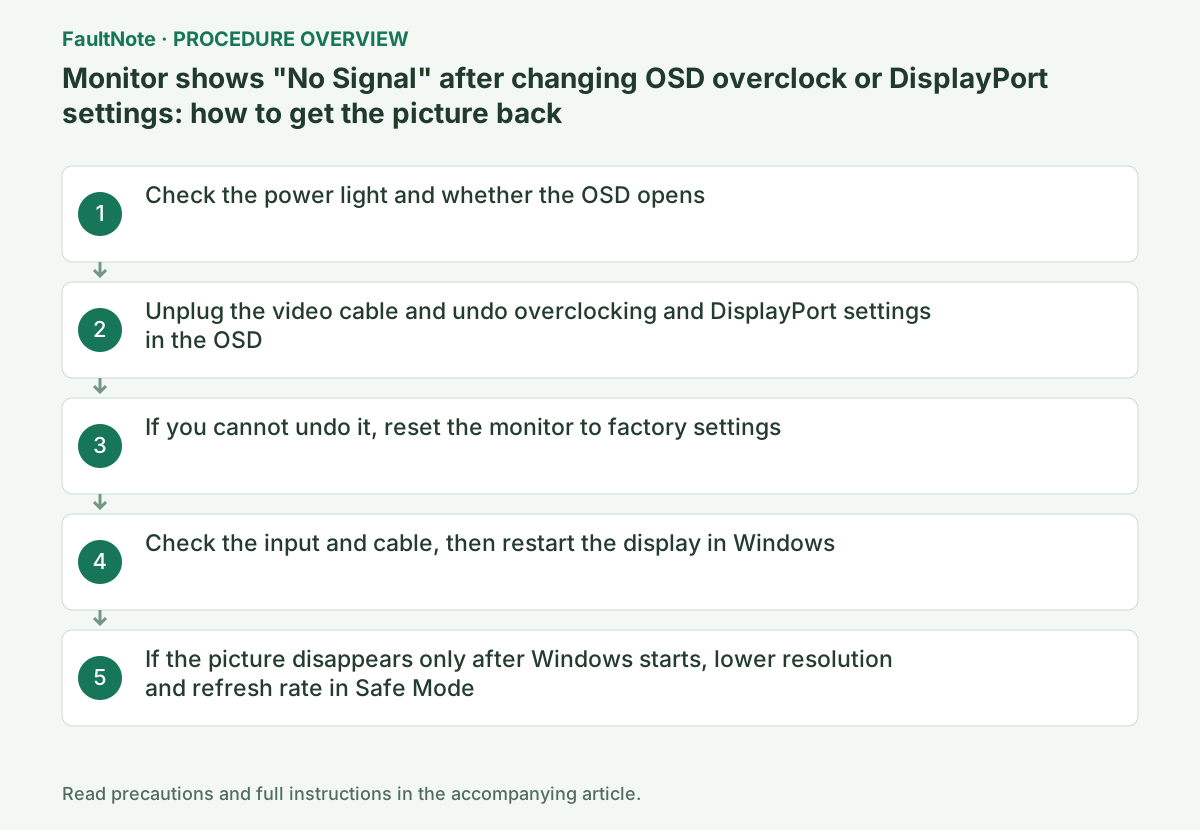
The quickest fix is to undo the monitor setting you just changed. ASUS advises that if there is no image after overclocking, you disconnect the video cable and use the OSD to set a lower maximum refresh rate. If that does not work, reset the monitor to factory settings, check the input selection and cable, restart the graphics driver in Windows, and lower the resolution or refresh rate from Safe Mode.
This is a general troubleshooting guide, not an announcement of a current outage.
Affected products and symptoms
- Product
- Gaming monitor OSD settings
- Versions and conditions
- Windows 11 / Windows 10. The screen shows "No Signal" or stays black right after you changed overclocking (a higher maximum refresh rate) or the DisplayPort version setting in the monitor's on-screen menu (OSD), or after adding a custom resolution in the graphics driver
Symptoms
- Right after turning on overclocking or raising the maximum refresh rate in the monitor OSD, the monitor shows "No Signal" or the screen stays black
- After switching the DisplayPort version setting (such as DisplayPort 1.1, 1.2 or 1.4), the same cable and PC no longer show a picture, or the available resolutions changed
Causes and conditions
The video signal the PC sends no longer matches what the monitor accepts. When the monitor, cable or graphics card cannot handle the refresh rate set by overclocking, or when the OSD DisplayPort setting does not match the PC's output, the picture disappears. This does not necessarily mean the PC or monitor is faulty, so first return the monitor's own settings, then check Windows and the driver.
Before you start
- The monitor model and its manual (menu names for overclocking, DisplayPort settings and reset differ by model)
- A note of the setting you just changed and its previous value; a spare video cable or another video output on the PC helps you isolate the cause
Precautions
- The refresh rates available through overclocking and the related warranty terms differ by manufacturer and model. If the picture is garbled or flickers, do not push higher; return to a lower value as ASUS advises.
- A factory reset returns every setting stored in the monitor, including colour and gaming options, to its default. This article did not reproduce the problem on real hardware; the steps are based on the manufacturers' published documents.
Tools and official pages used in this guide
Step-by-step instructions
Look at the monitor's power light and press a button to see whether the OSD (the monitor's own menu) appears. ASUS FAQ 1012723 says that when the screen is black but the power light is on, check in order: waking the PC from sleep, the cable connection, the input source, another cable, another computer, and the light colour. What each light colour means depends on the model, so compare it with the manual.
If the OSD appears, the monitor is working and its settings can be changed. ASUS's overclocking FAQ has you operate the OSD with the video cable unplugged to undo the setting, and the next step uses the OSD in the same way. If neither the OSD nor the power light responds, the cause may not be a setting; check the power cable and outlet, and contact the manufacturer.
Official links for this step
ASUS FAQ 1036290 (last updated June 2, 2025) says that if there is no image after overclocking, disconnect the video cable (DP or HDMI) and use the OSD to try again with a lower "Max Refresh Rate". The same FAQ says to turn off Adaptive-Sync (FreeSync) or G-SYNC before adjusting, and shows the path "Gaming" > "Over Clocking" > "ON" > "Max Refresh Rate". Turn overclocking off first, or set the value you used before.
If you changed a setting that selects the DisplayPort version, return it to its previous value in the same way. Dell article 000129296 (last modified June 3, 2026) explains that the OSD DisplayPort setting can limit the maximum resolution offered and tells you to find the menu location in the model's manual. Setting names and options differ by model, so if you do not know the previous value, use the reset in the next step.
After undoing the setting, plug the video cable back in and check whether the PC picture appears.
If you do not know which setting changed, or the picture still does not return after undoing it, reset the monitor to factory settings. ASUS FAQ 1012723 shows pressing "MENU" and choosing "System Setup" > "Restore factory mode (Reset)" > "Yes". Dell article 000132354 also says Dell monitors can be reset to factory defaults from the OSD, with the steps in the monitor manual.
A reset returns brightness, colour, gaming options and every other stored setting to its default. Set the options you need again one at a time once the picture is back.
Official links for this step
After a reset, the input may be back on automatic selection or on another port. Following ASUS FAQ 1012723, select the port the cable is connected to (DisplayPort, HDMI and so on) as the input in the OSD, and make sure both ends of the cable are firmly seated. Trying another cable of the same type tells you whether the cable is the problem.
If the PC is running but there is still no picture, follow Microsoft's article and press Windows logo key + Ctrl + Shift + B to restart the graphics driver. A beep or a brief screen flicker means it worked. If nothing appears, press Windows logo key + P, press P again and press Enter to cycle the projection mode (PC screen only, duplicate, extend). With several monitors connected, the picture may be going only to another monitor.
Official links for this step
- 05
If the picture disappears only after Windows starts, lower resolution and refresh rate in Safe Mode
#If the manufacturer logo or BIOS screen appears but the monitor loses signal once Windows starts, a resolution or refresh rate set in Windows or the driver may be the cause. ASUS FAQ 1012723 advises entering Safe Mode to adjust the resolution or refresh rate. Microsoft's article says to force a shutdown two or three times until recovery appears, choose "Troubleshoot" > "Advanced options" > "Startup Settings" > "Restart", then press F5 for "Safe Mode with Networking".
Once Safe Mode shows a picture, delete any custom resolution you added in AMD Software or the NVIDIA Control Panel, restart normally and check that the standard refresh rate displays. AMD article DH3-032 notes that the screen may go blank briefly while a new custom resolution is checked for compatibility. When the picture is stable, pick higher refresh rates again one step at a time from "Choose a refresh rate" as Microsoft describes, and confirm that your cable and port support that setting.
Check the result
- The PC desktop appears, and after a restart the picture stays on from the manufacturer logo through to the Windows sign-in screen
- Windows Settings > System > Display > Advanced display shows the resolution and refresh rate you intended
If the problem continues
- If another PC, console or laptop also shows no picture on this monitor, or nothing changes after a factory reset, contact the manufacturer's support, since the monitor itself may be faulty
- If other monitors work but this one does not, try different combinations of PC video outputs (DisplayPort or HDMI) and cables, and record which combinations work before contacting support
Scope of this guide
Troubleshooting guide — With the video cable unplugged, undo overclocking or the DisplayPort setting in the OSD, or reset the monitor to factory settings if you cannot. Then check the input and cable, restart the graphics driver in Windows, and lower the resolution or refresh rate from Safe Mode.
Frequently asked questions
If overclocking caused "No Signal", is the monitor broken?
Not necessarily. ASUS advises disconnecting the video cable and lowering the maximum refresh rate in the OSD when there is no image after overclocking. If the OSD appears and the picture returns after undoing the setting, the combination of settings was the cause. If neither the power light nor the OSD responds, contact the manufacturer.
What should I watch for when trying overclocking again?
ASUS lists confirming that both the graphics card and monitor support it, the latest graphics driver, a suitable video port, and turning off Adaptive-Sync (FreeSync) or G-SYNC before adjusting. Raise the value in small steps and write down each value so you can return to the previous one as soon as the picture drops out.
Official sources and dates
- [LCD Monitor] How to set up overclocking for LCD monitors? ↗
- ASUS FAQ 1012723: [LCD Monitor] Troubleshooting - No display after turning monitor ON (last updated August 28, 2026) ↗
- Dell 000129296: DisplayPort settings of the LCD display may limit resolution (last modified June 3, 2026) ↗
- Dell 000132354: How to Troubleshoot Display or Video Issues on a Dell Monitor (last modified April 19, 2026) ↗
- Microsoft Support: Troubleshooting blank screens in Windows ↗
- Microsoft Support: Change the refresh rate on your monitor in Windows ↗
- AMD: How to Create Custom Resolutions Using AMD Software (DH3-032) ↗
Source publication or resolution date: 2025-06-02. Sources checked: 2026-09-13. The check date is not the date the problem first occurred. Interface labels can vary between versions and display languages.