4K text too small? Choosing size, resolution and Windows scaling from published PPI
"I moved to 4K and now I can't read anything" and "if I scale it up, what was the point of 4K?" are both answerable from published numbers. Windows treats 100% scaling as 96 DPI - 96 pixels per linear inch - and monitor makers publish pixel pitch and PPI in their specification tables. Dell's user guide gives a pixel pitch of 0.1554 mm and 163.18 PPI for its 27-inch 4K model and 0.18159 mm and 137.68 PPI for the 31.5-inch one; ASUS publishes 109 PPI and a 0.233 mm pitch for the 27-inch QHD ProArt PA278CGV. Divide PPI by the scale factor and the comparison falls out: a 27-inch 4K panel at 150% comes to almost exactly the same apparent text size as a 27-inch QHD panel at 100%. The guide then covers why some older desktop apps go blurry, and the four situations in which Microsoft says it happens.
Published · Updated · FaultNote editorial policy
Who this guide is for and what to prepare
- People choosing between 4K and QHD at 27 or 32 inches, with readable text as the deciding factor
- People who bought a 4K monitor and cannot decide on a scale factor, or suspect scaling defeats the purpose
- People who see certain apps go blurry or change size only when a laptop is connected to an external monitor
What you need
- The specification table for the monitors you are considering (panel size, resolution, and a pixel pitch or PPI figure)
- The scale factor your current setup uses (Settings > System > Display > Scale)
- Which kind of applications you use most (recent apps, or long-lived business desktop applications)
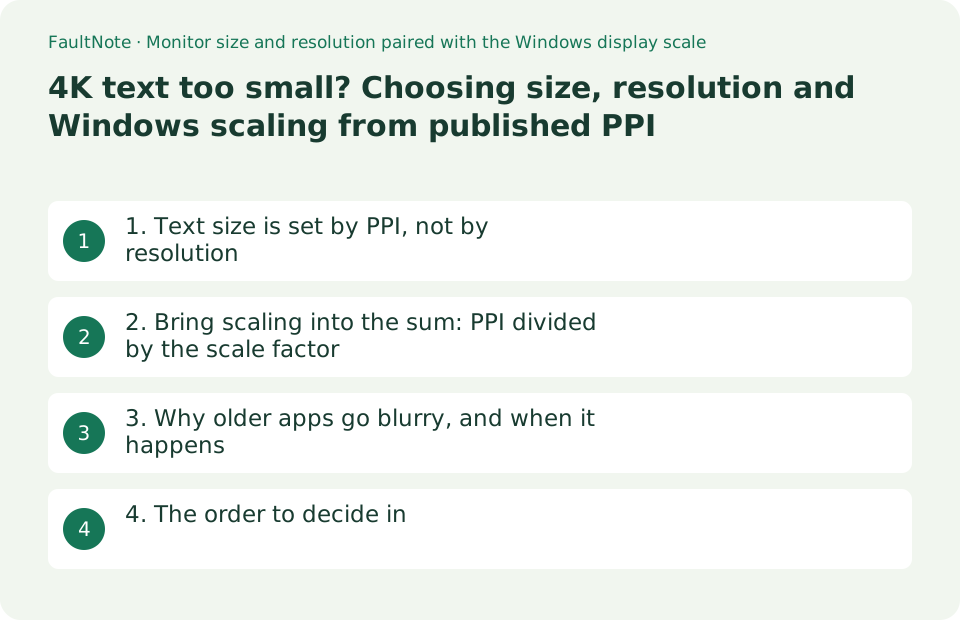
1. Text size is set by PPI, not by resolution
At the same 27 inches, a different resolution means a different number of pixels per character, and therefore a different physical size on screen when nothing is scaled. PPI - pixels per inch - captures that in one number, and it is the inverse of pixel pitch, the distance between neighbouring pixels. Where only the pitch is published, PPI = 25.4 / pixel pitch in mm (that conversion is this site's arithmetic).
Makers do publish these figures. The ASUS ProArt PA278CGV specification table (27 inches, 2560x1440) lists Pixels Per Inch (PPI) 109, Pixel Pitch 0.233mm and a display viewing area of 596.74 x 335.66 mm. Dell's user guide for the 27-inch 4K U2723QE and the 31.5-inch 4K U3223QE lists them per model: pixel pitch 0.1554 mm with 163.18 PPI, and 0.18159 mm with 137.68 PPI.
Side by side the gap is obvious. The ASUS ProArt PA278CGV (27-inch QHD) and the Dell U2723QE (27-inch 4K) both publish a viewing area of 596.74 x 335.66 mm, so on an identically sized panel the PPI is 109 against 163.18. Unscaled, text on the 4K panel is roughly 1.5 times finer - that is, smaller. The common reaction that 4K is "too small" matches that ratio exactly.
It is worth seeing the other end as well. The ASUS TUF Gaming VG279QM (27 inches, 1920x1080) publishes a pixel pitch of 0.311 mm, which the formula above turns into roughly 81.7 PPI (this site's arithmetic). The same page, though, publishes a viewing area of 567.6 x 336.15 mm, while 1920 x 0.311 mm comes to about 597.1 mm - so the pitch and the viewing area on that page do not agree with each other. The PPI above is converted from the pixel pitch; computed from the viewing area it would be about 85.9. ASUS does not say which figure is the correct one, so both are given here. At the same 27 inches, Full HD gives larger text and less of it on screen. Size and resolution are not two separate choices; they collapse into this one number.
Scroll horizontally to see the full table →
| Model (size and resolution) | As published by the maker | PPI (published, or this site's conversion) |
|---|---|---|
| ASUS TUF Gaming VG279QM (27in, 1920x1080) | Pixel pitch 0.311mm, viewing area 567.6 x 336.15 mm | About 81.7 (25.4 / 0.311, this site's conversion). From the viewing area it would be about 85.9 - ASUS's two published figures do not agree |
| ASUS ProArt PA278CGV (27in, 2560x1440) | PPI 109, pixel pitch 0.233mm, viewing area 596.74 x 335.66 mm | 109 (published by ASUS) |
| ASUS ROG Swift OLED PG27AQDM (26.5in, 2560x1440) | Pixel pitch 0.229mm | About 110.9 (this site's conversion) |
| Dell U2723QE (27in, 3840x2160) | Pixel pitch 0.1554mm, PPI 163.18, viewing area 596.74 x 335.66 mm | 163.18 (published by Dell) |
| Dell U3223QE (31.5in, 3840x2160) | Pixel pitch 0.18159mm, PPI 137.68, viewing area 697.31 x 392.23 mm | 137.68 (published by Dell) |
| The conversion | PPI = 25.4 / pixel pitch in mm | For Dell's 27-inch 4K, 25.4/0.1554 gives about 163.4 against the published 163.18 - the pitch figure is rounded |
2. Bring scaling into the sum: PPI divided by the scale factor
The Windows baseline is stated in Microsoft's developer documentation: "In the past, most displays had 96 pixels per linear inch of physical space (96 DPI)". A scale factor of 100% renders against that 96 DPI assumption, so on any monitor with a PPI above 96, leaving the scale at 100% makes text smaller than that baseline.
To line two setups up, divide PPI by the scale factor. A 27-inch 4K panel (163.18 PPI) at 150% gives 163.18 / 1.5 = about 108.8; a 27-inch QHD panel (109 PPI) at 100% gives 109. They almost coincide, so as far as text size goes the two look the same. A 31.5-inch 4K panel (137.68 PPI) at 125% gives 137.68 / 1.25 = about 110.1, which is close again (all of these are this site's arithmetic).
The worry that scaling "defeats the point of 4K" is half right. A 27-inch 4K panel at 150% fits 3840 / 1.5 = 2560 by 2160 / 1.5 = 1440 logical pixels of window space, which is the same working area as QHD (this site's arithmetic). But text and shapes are still drawn in real pixels, so the same size of character is rendered with more of them. Whether you want working area or smoothness at the same area is the actual question. At 125% (equivalent to 3072 x 1728) the working area grows as well.
Microsoft's support page gives the settings. To scale everything, go to Start > Settings > System > Display and choose a value in the Scale drop-down; to enlarge only text, use Settings > Accessibility > Text size. A custom scale between 100% and 500% can be created, but Microsoft states plainly "we do not recommend it", so matching a value from the list is the safer route.
Scroll horizontally to see the full table →
| Configuration | PPI / scale factor (this site's arithmetic) | What it looks like |
|---|---|---|
| 27in QHD (109) at 100% | 109 | The reference point used here; usable as-is at 1:1 |
| 27in 4K (163.18) at 100% | 163.2 | About 1.5x finer than the reference - too small for most people |
| 27in 4K (163.18) at 125% | About 130.5 | Still finer than the reference; working area equivalent to 3072 x 1728 |
| 27in 4K (163.18) at 150% | About 108.8 | Practically the same size as 27in QHD at 100%; working area equivalent to 2560 x 1440 |
| 31.5in 4K (137.68) at 125% | About 110.1 | Also close to the reference; the figure to aim at when buying 4K around 32 inches |
| 27in FHD (about 81.7) at 100% | About 81.7 | Larger than the reference: easy to read, less on screen |
3. Why older apps go blurry, and when it happens
The familiar case where one app goes blurry once you raise the scale factor is documented as a mechanism. Microsoft writes that by default "the system considers desktop applications DPI unaware and bitmap-stretches their windows". DPI unaware applications "render at a fixed DPI value of 96 (100%)", and whenever they run on a display scaled above 96 DPI "Windows will stretch the application bitmap to the expected physical size. This results in the application appearing blurry."
There is a middle state. Applications that are system DPI aware "only render crisply at a single display scale factor, becoming blurry whenever the DPI changes", because Windows bitmap-scales their windows when they move to a display with a different scale factor. Per-Monitor V2 awareness, introduced with the Windows 10 Creators Update (1703), is not bitmap-stretched in that situation. Whether an app goes blurry is therefore a property of the app, not of the monitor.
Microsoft also lists when the scale factor changes at all: moving an application between multiple monitors that have different scale factors (its example is a 4K and a 1080p display); docking or undocking a high-DPI laptop with a low-DPI external display, or the reverse; connecting by Remote Desktop from a high-DPI machine to a low-DPI one, or the reverse; and changing the display-scale setting while applications are running. A single desktop left at one scale factor rarely meets any of them; a laptop plus an external monitor meets them constantly.
That turns into a buying rule. If your work depends on long-lived desktop applications, choosing a combination where the scale factors do not differ between the laptop panel and the external monitor matters more than the resolution itself. If you mostly run recent applications, pick whichever combination in the previous table gives the effective figure you like.
Scroll horizontally to see the full table →
| How the app is built (Microsoft's categories) | What Windows does | What the user sees |
|---|---|---|
| DPI unaware (the default assumption) | Renders at a fixed 96 DPI and bitmap-stretches the window | Always blurry on a scaled display |
| System DPI aware | Crisp at one scale factor only; bitmap-scaled when the DPI changes | Sharp on the main display, blurry after moving to one scaled differently |
| Per-Monitor V2 (Windows 10 1703 and later) | No bitmap stretching; the app redraws itself | Survives moves between displays |
| Several displays with different scale factors | Named by Microsoft as a case where the scale factor changes | The window blurs or resizes the moment it is dragged across |
| Docking or Remote Desktop | Also named as a case where the scale factor changes | Display problems appear only while connected |
| Changing the scale while apps run | Also named | Everything looks wrong until the app is restarted |
4. The order to decide in
Rather than size, then resolution, then scaling, work backwards from the effective density you want. If your current setup is comfortable, calculate its figure first: read the scale factor in Settings > System > Display and convert the specification's pixel pitch or PPI. That number is your reference. Then pick a combination whose published figures land near it.
Next decide whether you want more working area or the same area rendered more finely. A 27-inch 4K panel at 150% has the same working area as QHD (equivalent to 2560 x 1440) and only adds smoothness; at 125% the area grows to the equivalent of 3072 x 1728 while the text drops below the reference size. Choosing 4K at around 32 inches gives both an effective figure near the reference at 125% (about 110.1) and a physically larger picture.
Settle the mixed-scaling question in advance as well. As the previous section showed, Microsoft names differing scale factors between a laptop and an external display as the case where older applications blur. If the laptop you carry has a high-PPI panel, choosing an external monitor whose effective figure is close to it removes most of the jarring behaviour when windows move between them.
Finally, some products publish neither a pixel pitch nor a PPI. You can compute it from the viewing area in millimetres and the resolution, but the result is not a published figure, so treat it - like this site's conversions - as an estimate. GPU load and resolution for gaming are a different question, covered in our separate guide on gaming monitor resolution against GPU budget.
Scroll horizontally to see the full table →
| What you want | Candidate combination | Effective figure by this guide's arithmetic (PPI / scale) |
|---|---|---|
| The same apparent size as my 27in QHD, but smoother | 27in 4K at 150% | About 108.8, against 109 for 27in QHD at 100% |
| More working area (slightly smaller text is fine) | 27in 4K at 125% | About 130.5; working area equivalent to 3072 x 1728 |
| Both area and readability | 31.5in 4K at 125% | About 110.1, on a physically larger panel than 27 inches |
| Larger text, or mostly older applications | 27in FHD at 100%, or any setup with no mixed scaling | About 81.7; leaving the scale alone avoids the situations that cause blurring |
| A laptop used alongside an external monitor | A pair whose effective figures are close | Matching scale factors avoids the documented blurring case |
| No PPI or pixel pitch on the specification sheet | Convert from viewing area and resolution | Not a published figure; treat it as an estimate |
Limitations and requirements
- The pixel pitch, PPI and viewing area figures are as published on the ASUS specification pages and in the Dell user guide PDF captured on 2026-09-19. The conversions - PPI divided by the scale factor, and 25.4 divided by the pixel pitch - are this site's arithmetic, not values published by the makers. The formulas are shown in the body so the same numbers can be recomputed.
- The Microsoft Learn document used for the blurring explanation is developer documentation. It is used here only for how the display behaves and for the situations in which the scale factor changes. Actual behaviour depends on how each application is built, so not every application behaves the same way.
- Readability also depends on viewing distance, eyesight, font settings and preference. This guide compares published figures and shows the arithmetic; it does not report a side-by-side assessment of how the monitors look, because none was carried out. Where possible, look at the same size and resolution in a shop.
Frequently asked questions
At 27 inches, should I buy 4K or QHD?
On text size alone, a 27-inch 4K panel at 150% looks almost exactly like a 27-inch QHD panel at 100%. The arithmetic uses the 109 PPI ASUS publishes for the ProArt PA278CGV and the 163.18 PPI Dell publishes for the U2723QE: 163.18 / 1.5 = about 108.8 (this site's calculation). What 4K adds is that the same size of character is drawn with more pixels, and that intermediate settings such as 125% (equivalent to 3072 x 1728) are available. If you would rather not change the scale factor at all, or you lean on older desktop applications, QHD at 100% is the simpler setup. Note that both models publish the same 596.74 x 335.66 mm viewing area, so the physical picture is the same size.
If I set scaling to 150%, have I wasted the 4K panel?
In working-area terms, a 27-inch 4K panel at 150% gives 3840 / 1.5 = 2560 by 2160 / 1.5 = 1440, which is the same area as QHD (this site's calculation). But rendering still happens in real pixels, so the same size of text is drawn with more of them. If you want area instead, 125% (equivalent to 3072 x 1728) is available, at the cost of text smaller than the reference size. Which matters more is a preference, so "wasted" is too strong. One practical note: Microsoft states that it does not recommend creating a custom scale (between 100% and 500%), so choosing from the listed values is safer than inventing an intermediate one.
Certain apps go blurry only when my laptop is connected to an external monitor.
That is one of the cases Microsoft names. Its documentation lists moving an application between displays with different scale factors, docking or undocking a high-DPI laptop with a low-DPI external display, connecting by Remote Desktop between machines of different DPI, and changing the scale setting while applications are running. Mechanically, DPI unaware applications render at a fixed 96 DPI and have their bitmaps stretched, while system DPI aware applications are crisp at one scale factor and bitmap-scaled at any other. It is not a fault in the monitor but a consequence of how the application was built. The practical responses are to restart the application, or to choose monitors whose effective figures put both screens on the same scale factor.
Sources and verification date
Sources checked: . These sources support the specifications, procedures or prices discussed here. Check each source for applicable conditions and current information.
Related practical guides
- Check PC-Part Compatibility Before Buying: CPU, BIOS, RAM, Case and Power
- Air cooler or AIO? Choose by case clearance, noise and maintenance
- PCIe 4.0 or 5.0 SSD for gaming? Check load times, capacity and slot sharing
- DDR4 vs. DDR5: Choose for a New Build, Reused RAM and Upgrade Cost
- DDR5 with Two or Four DIMMs: Compare Upgrade Speed Limits and Kits
- Integrated vs. Discrete Graphics: Check Workloads, CPU Models and Outputs